Ice and Water Shield: Where It Goes, What It Costs, and What Code Requires
Ice and water shield is the self sealing membrane that stops ice dam backup at the eaves. Where it belongs on a roof, how it differs from underlayment, what the code says, and national cost figures.

TL;DR: Ice and water shield is a peel and stick membrane of rubberized asphalt or polymer modified bitumen that bonds to the roof deck and seals around the nails driven through it. It goes where water backs up or collects: the eaves, the valleys, around chimneys and skylights, and over low slope sections. Regular underlayment covers the rest of the roof. The International Residential Code (R905.1.2) requires an ice barrier at the eaves wherever there's a history of ice backing up water, running from the roof edge to at least 24 inches inside the exterior wall line, and Massachusetts uses that same rule. National cost guides put installed membrane around $4 to $5.50 per square foot. It won't stop ice dams from forming. It stops the water behind them from getting into the house.
Ice Dams · 9 min read
Every winter I get calls about water dripping out of a ceiling right along an outside wall. Nine times out of ten there’s an ice dam at the eave, and the roof underneath it has no ice and water shield, or not enough of it.
That membrane is a cheap line item on a reroof. Leaving it out is not cheap.
Below I cover what the stuff is and where it goes. Then how it stacks up against regular underlayment, what code wants, and the cost. The code language is from the International Residential Code, section R905.1.2, which Massachusetts uses in its residential code. Product numbers come from the published data sheets and install instructions for Grace Ice & Water Shield and GAF’s StormGuard and WeatherWatch. Owens Corning WeatherLock is in the same family. Cost figures come from national cost guides (Angi and Homewyse), so treat them as ballpark numbers, not our prices.
What Ice and Water Shield Actually Is
Ice and water shield is a self adhering membrane that sticks straight to the roof deck under the shingles or slate. You never see it once the roof is done. Grace makes the product that gave the whole category its name, and the other big makers sell their own. GAF calls theirs a leak barrier. Owens Corning sells WeatherLock.
The material is rubberized asphalt or polymer modified bitumen with a release film on the sticky side. You peel the film off and lay the sheet on clean plywood. Then you press it down hard. Grace’s sheet is 40 mil thick. GAF lists StormGuard at a nominal 55 mil and WeatherWatch at 73.
The data sheets list a lot of features, from thickness to traction surfaces to how far below zero the sheet stays flexible. Thickness isn’t the point, though. What matters is that nails go through it and it closes up around them.
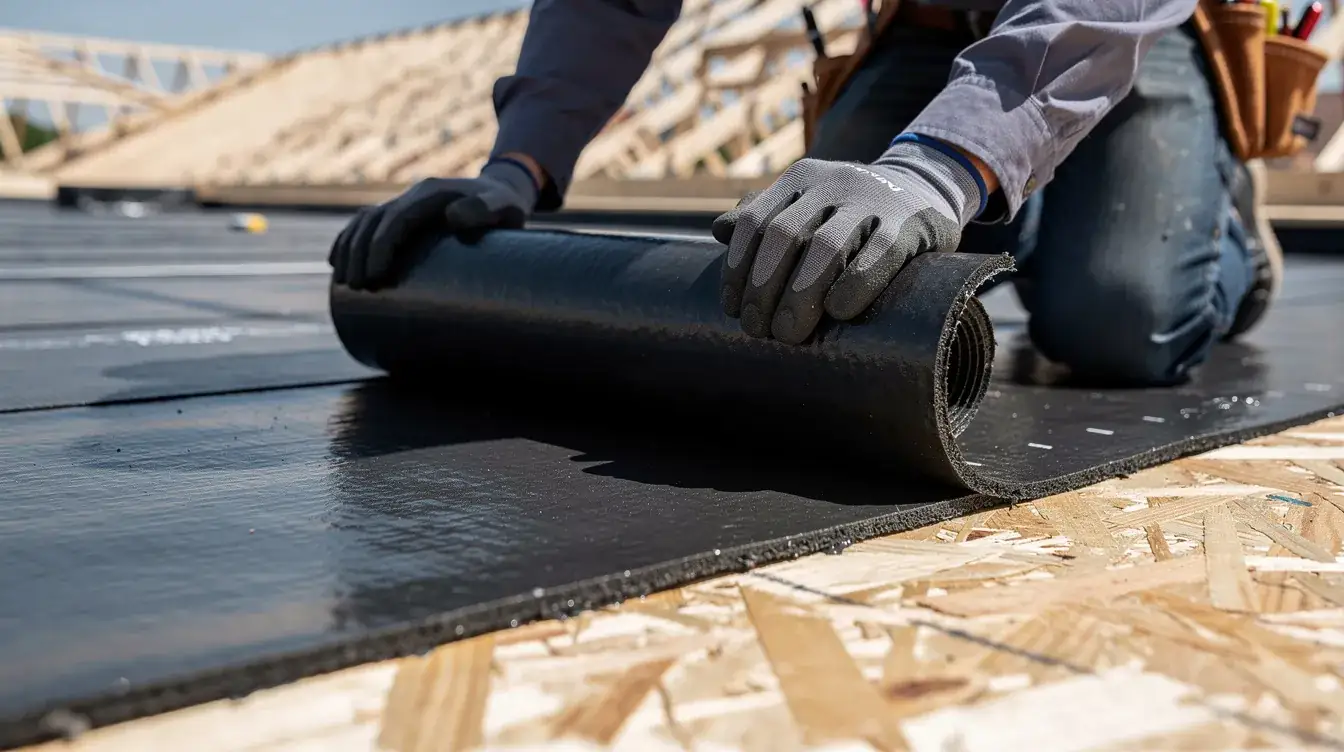
Regular underlayment is stapled or nailed, and every fastener leaves a hole. Water running down a roof won’t find those holes much. Water sitting on top of them will. The rubberized layer grips the shank of every roofing nail, so even standing water behind an ice dam has nowhere to go. Grace’s data sheet says it seals around fasteners and resists leaks from ice dam backup or wind driven rain, and that matches what I see when we tear off old roofs.
Ice Dams and Why Asphalt Shingles Leak at the Eaves
Heat loss from the house warms the upper roof deck and the snow on it melts. That meltwater runs down to the eave, which hangs out past the wall and stays cold, and it freezes there. Ice forms a ridge, and it forms fast. Do that for a week and you have a ridge of ice holding a pool of water behind it.
Shingles and slate shed water that’s moving downhill. Neither one was made to hold a puddle. The water creeps up under the laps and finds the nail holes in the underlayment. From there it comes through the deck into the wall or ceiling. Wet plaster is usually the first thing people notice. The eaves and valleys are the high risk areas. So is the base of a chimney. The damage you can’t see is soaked insulation and wood rot in the deck.
Ice and water shield doesn’t change how ice dams form. Air sealing and attic insulation, along with venting, are what cut the heat that starts them, and we’ve covered that in our ice dam prevention guide. The membrane is there to protect the house from whatever water gets past the roofing anyway. It can’t prevent the ice. It can stop the leak. On a complicated roof with dormers and valleys you need both.
Ice Dam Protection Starts at the Eaves
The code calls it an ice barrier. IRC section R905.1.2 says that where there’s a history of ice forming along the eaves and backing up water, an ice barrier has to go in under asphalt shingles and slate, plus most other steep roof coverings. It can be two layers of underlayment cemented together or a self adhering polymer modified bitumen sheet. It runs from the lowest edge of the roof to a point at least 24 inches inside the exterior wall line. On roofs 8:12 or steeper it also has to go at least 36 inches up the slope from the eave.
People misread that 24 inch rule all the time. It’s measured inside the wall, not up from the gutter. Take a house with a two foot overhang. The barrier has to reach about four feet in plan before it clears the warm wall, which on a normal pitch usually means two courses of a 36 inch roll, not one.
Massachusetts went to the 10th edition of its building code in 2024, and its residential code carries the same R905.1.2 wording. Check with your local building department for anything specific to your town. For an older house with deep eaves and a bad ice history, I’d go past the minimum.
Valleys and Other Leak Prone Areas
The code only covers the eaves. Manufacturer instructions and decent roofing practice put membrane in a few more places.
Valleys come first. Water from two slopes pours down one line. Grace’s instructions say to lay membrane in the valleys before the eaves. You center the sheet on the valley and press it in. The metal or shingle valley goes on top of that. Then penetrations: chimneys and skylights, plus plumbing vents. Penetrations are where most leaks I chase start. Membrane goes on the deck around them and under the metal flashing, so if a joint opens up years later there’s still a barrier under it. Sidewalls and dormer cheeks get it too. Anywhere the roof runs into a wall, membrane under the step flashing gives you a second line of defense. Rakes are optional but smart. GAF’s instructions cover rakes along with eaves on their leak barrier, and it’s a cheap add in wind driven rain country.
GAF’s product page lists the same spots for StormGuard, from eaves and valleys to the ground around chimneys and skylights. That’s the industry norm. It isn’t one company’s trick.
Ice and Water Shield Versus Roofing Underlayment
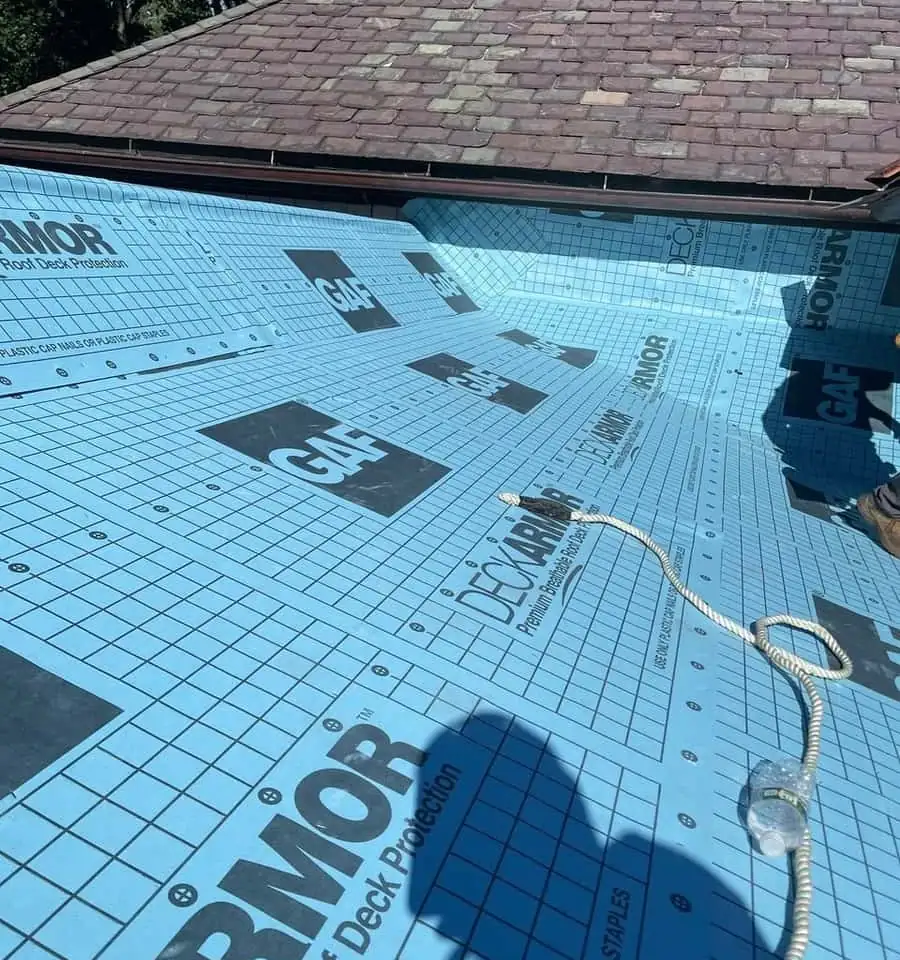
Underlayment covers the whole deck as a general water resistant layer. Ice and water shield goes only where water collects or backs up. On most roofs you get both, membrane at the leak prone areas and underlayment everywhere else, lapped so water always runs over the seams.
Underlayment comes in two kinds. Felt is asphalt soaked paper, the stuff roofs used for a hundred years. Synthetic underlayment is a woven or spun polymer sheet. It’s lighter and tears less. It also holds up better than felt if it gets rained on before the roofing goes on. Both get fastened through, so both are water resistant. Neither one is waterproof, and neither blocks standing water.
The membrane blocks standing water. That’s the whole difference.
It’s also why underlayment is the cheaper of the two. Per square foot, membrane runs several times the price of synthetic underlayment, up to about five times when you compare a premium membrane against a basic synthetic.
Self Sealing Membrane on Slate and Older Decks
On a slate roof the membrane goes down the same way it does under asphalt shingles, but the old houses throw a few curves.
A lot of older homes around Boston have board sheathing, sometimes with gaps between the boards. Membrane wants a smooth, solid deck. Grace says to install on a clean, dry, continuous deck. Where the boards are gapped or rotted, they need to be fixed or covered before the membrane goes on. GAF also warns that pitch bleeding out of some board decks can attack its leak barrier, which is worth knowing on a house with original pine boards.
Temperature matters too. Grace wants the air and the deck at 40°F or warmer, and the membrane too. GAF says 45°F for StormGuard. In January that limits your days.
The overlap at every seam is spelled out on the data sheets. Grace calls for 3.5 inch side laps and 6 inch end laps. GAF says 3 inches and 6. Every lap has to shed water, which means you always work from the bottom of the roof up. Slate has a lifespan of 75 to 150 years when it’s cared for, and asphalt about 18 to 25. Either way that’s a long time to depend on a lap done right, so we don’t rush this part. More on that in our post on how long a slate roof lasts.
Should the Entire Roof Get Ice and Water Shield?
Usually no. Grace lists a maximum permeance of 0.05 perms, which means water vapor hardly gets through at all. Cover a steep roof deck end to end and any moisture coming up from the house gets trapped under it. In an old house with a tight attic and poor venting, that can rot the deck from underneath.
There are exceptions. Low slope roofs are the big one.
Grace’s own guidelines say to pair the membrane with good insulation and ventilation and to vent cathedral ceilings between the rafters. So before anyone talks about covering a whole roof, look in the attic. The membrane and underlayment work as one system with the venting, and you want them to match. If venting has to be added at the soffits or ridge, that comes first.
Full Coverage on Low Slope Sections
Asphalt shingles are allowed down to a 2:12 pitch under the IRC. Between 2:12 and 4:12 the code calls for a double layer of underlayment because water moves so slowly. Porch roofs and back additions land in that range. So do a lot of shed dormers.
On those low slope sections I’d rather run membrane over the whole surface than rely on doubled felt. Water drains slowly there and snow sits longer. Some ponding is normal. Full membrane coverage there costs a bit more and solves the problem.
Ice and Water Shield Cost
These are national cost guide figures. They are not Art Slate prices.
Angi puts professionally installed ice and water shield at about $4 to $5.50 per square foot. Homewyse’s 2026 estimate for a small standalone job is $6.96 to $8.66 per square foot, because minimum labor charges hit small areas hard. Material alone is cheaper. Retail rolls run from under $100 to around $250 depending on brand and roll size. Coverage depends on the product. A full Grace roll is 36 inches by 75 feet, 225 square feet. GAF’s StormGuard and WeatherWatch rolls are 200 square feet, and GAF says that excludes laps. Plan for less on the roof.
To calculate your own number, multiply the eave length by the coverage width you need. Add each valley at about 3 feet wide, then any low slope area. On a full roof replacement the membrane is a small slice of the job, since the deck is already open. Material delivery and setup are already paid for, so adding a second course at the eaves costs very little.
Ice and Water on a DIY Budget
You can buy it at any big box store, and a handy homeowner can lay it on a simple shed roof. Easy installation is part of why it’s sold that way.
On a house, I’d leave it to roofers. Membrane only goes on bare deck, so on an existing roof it means tearing off down to the boards at the eaves. A purchased roll laid wrong, with reverse laps or wrinkles, is worse than none because it holds water against the deck. Online reviews of a product tell you how well it sticks. They don’t tell you anything about the effectiveness of a lap somebody ran backwards. And on slate, lifting courses to get at the eave is how roofs get broken.
Talk to the Owner
If you’re getting water along an outside wall every winter, or you’re planning a roof replacement and want to know what should go under it, call us at 617-913-1130 or use the contact page. The roof assessment is free, and the owner walks every roof himself. We’ll check the eaves and the attic and tell you where membrane would help. If it only needs repair, we’ll say so. For roofs that keep building ice, our ice melt systems page covers heat cable, and our historic roof restoration page covers older slate and copper roofs.
Frequently Asked Questions
What Is Ice and Water Shield Made Of?
Rubberized asphalt or SBS polymer modified bitumen with a sticky back and a film or granular top. Grace’s data sheet calls theirs a rubberized asphalt adhesive backed by cross laminated polyethylene film. GAF’s StormGuard and WeatherWatch are fiberglass reinforced SBS modified bitumen.
Is Ice and Water Shield Required by Code?
At the eaves, in places with a history of ice backing up water. IRC R905.1.2 says the ice barrier runs from the lowest roof edge to at least 24 inches inside the exterior wall line, and at least 36 inches up the slope on roofs 8:12 or steeper. Massachusetts adopted that wording in its residential code. Valleys and penetrations aren’t in that section. Membrane goes there because manufacturer instructions and good practice call for it.
How Much Does Ice and Water Shield Cost?
Angi puts professionally installed membrane at about $4 to $5.50 per square foot nationally. Rolls at retail run from under $100 to about $250 depending on brand and size. Those are national guide figures, not our prices. Your number depends on how much eave and valley area your roof has, plus any low slope sections.
How Much Does a Roll Cover?
It depends on the product. A full roll of Grace Ice & Water Shield is 36 inches by 75 feet, or 225 square feet. GAF StormGuard and WeatherWatch rolls are 200 square feet, and GAF notes that figure excludes laps, so you’ll cover less on the roof.
Should the Entire Roof Get Ice and Water Shield?
Usually not on a steep roof over a heated attic. The membrane is close to a vapor barrier, about 0.05 perms on Grace’s sheet, so covering everything can trap moisture in the deck. Full coverage makes sense on low slope sections where water sits.
Can It Go On in Cold Weather?
Grace lists 40°F and up for the air and the deck, and for the membrane itself. GAF lists 45°F to 120°F for StormGuard. In a Boston winter that means picking your days.