Step Flashing on a Roof: How Boston's Roof-to-Wall Joints Stay Dry
How a step flashing roof-to-wall joint keeps water out on Boston's slate and copper homes: the right metal, correct install, warning signs, and when to call a pro.
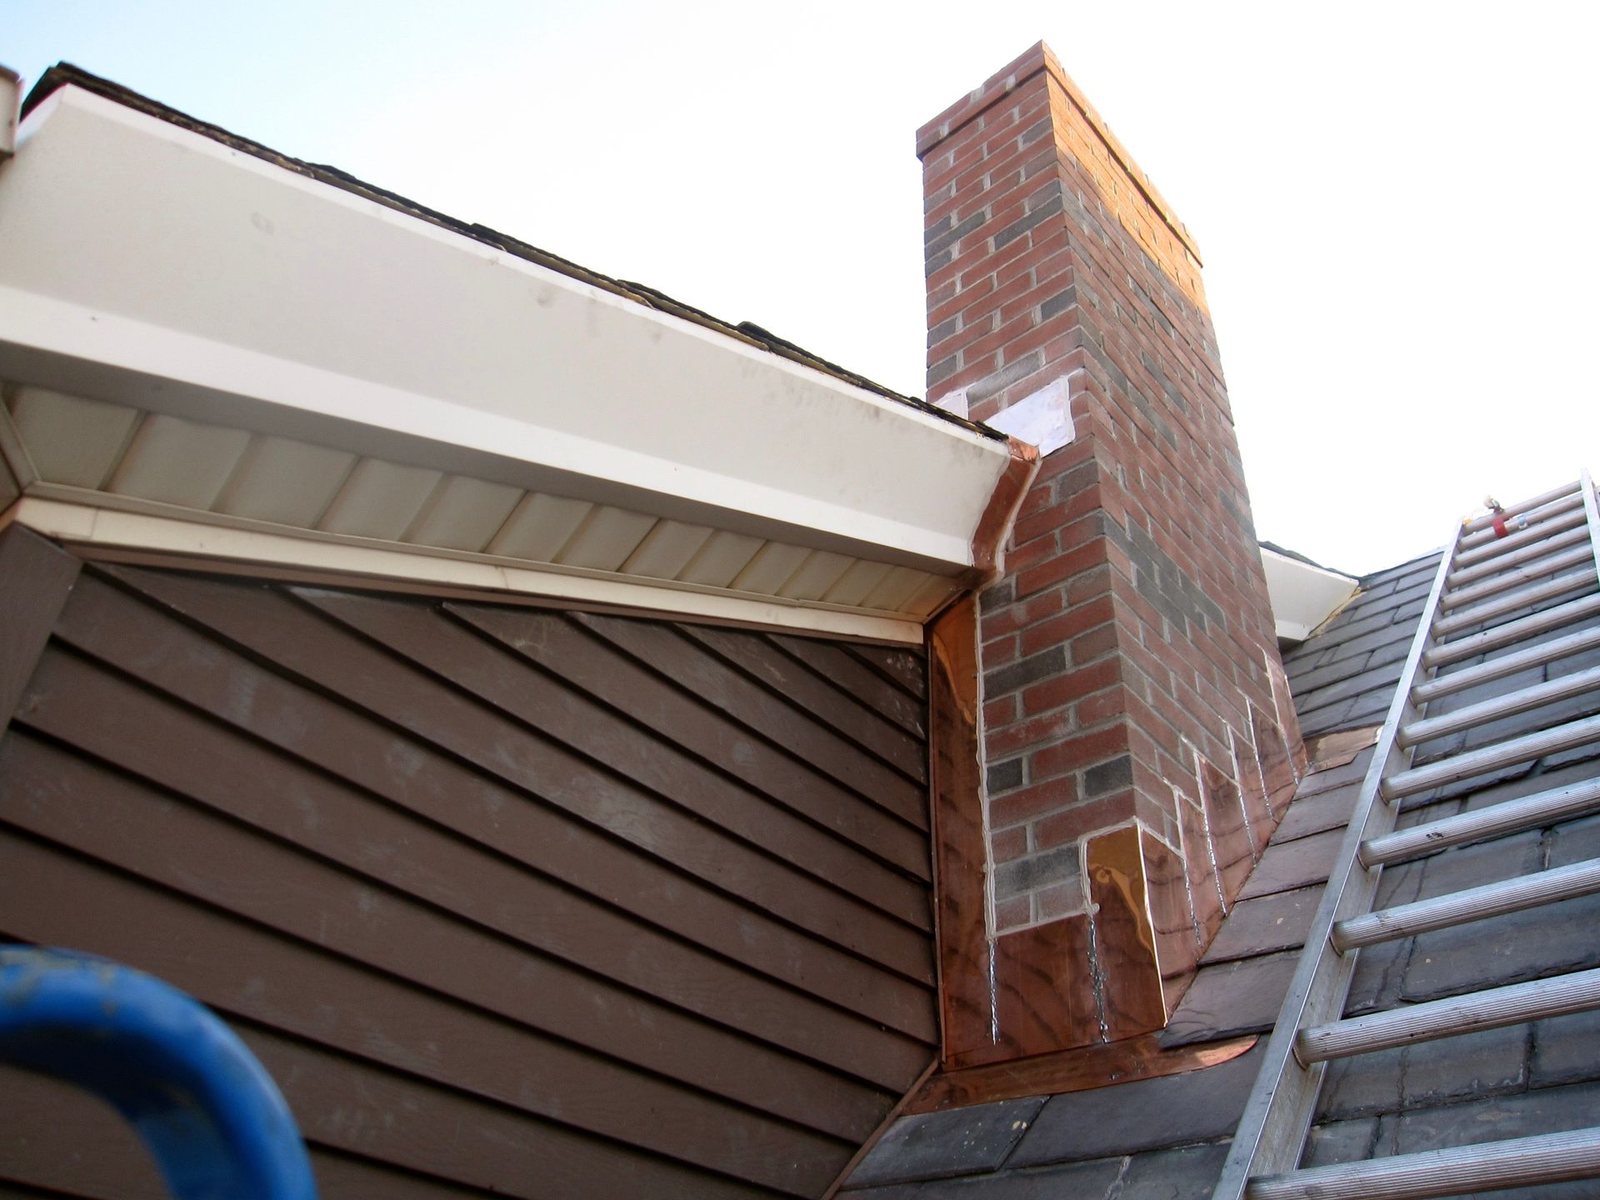
TL;DR: On the homes we work on, most roof-to-wall leaks trace back to failed step flashing, not a bad shingle. A step flashing roof detail is a row of small L-shaped metal pieces, one woven in per course, each turned up the wall so water sheds onto the shingles instead of behind them. Get the metal, the overlap, and the nailing right and the joint outlasts the roof. Skip it for caulk and the wall rots from the inside.
Copper · 13 min read
A stain shows up on a bedroom ceiling, a foot in from the outside wall. The homeowner blames a bad shingle. Nine times out of ten, on the roofs we work on, the water came in somewhere else. It came in at the joint where the roof meets a wall, and the small metal pieces meant to guard that joint had quit. Those pieces are step flashing.
A step flashing roof-to-wall joint is a row of L-shaped metal pieces, one woven in at every course of shingle or slate, each turned up against the wall beside it. Done right, they carry water down the roof and back out onto the shingles, never behind them. Done wrong, or skipped for a bead of caulk, they are the quiet reason a wall rots from the inside.
We are Art Slate Roofing, a family-run slate and copper shop out of Cambridge, working Greater Boston since 2005. Arturo Nieto started it and still walks every roof. Most of what we fix at these joints is not old age. It is flashing that was never installed the way the wall needed, work we handle as part of our Boston slate roof repair and copper roofing service. Here is what step flashing does, how to install step flashing so it lasts, and the signs that yours has already failed.
What a step flashing roof detail actually is
Step flashing is a set of individual L-shaped metal pieces installed in a step-like pattern alongside a vertical surface where it meets a sloped roof. Each piece has two legs. One rests flat on the roof surface. The other turns up the wall. A single piece of step flashing is installed at every course of shingles, so the metal climbs the wall in a stair pattern the full height of the joint.
Each piece overlaps the piece below it by about 2 to 3 inches. That overlap is the whole trick. It builds one continuous metal path down the roof, so water landing high on the joint always drops onto the next piece of metal and rides it down, shingle by shingle, until it reaches the roof surface below. Nothing ever touches the sheathing or the framing beneath.
Step flashing protects roof-wall intersections from water intrusion in more places than people think. Sidewalls. Dormer cheeks. Gable ends. The spot where an addition ties into the house. And around a chimney, where it works with base flashing and counter flashing to close all four sides. Wherever the roof plane runs into a wall, that joint needs metal, not hope.
Copper, galvanized steel, or aluminum
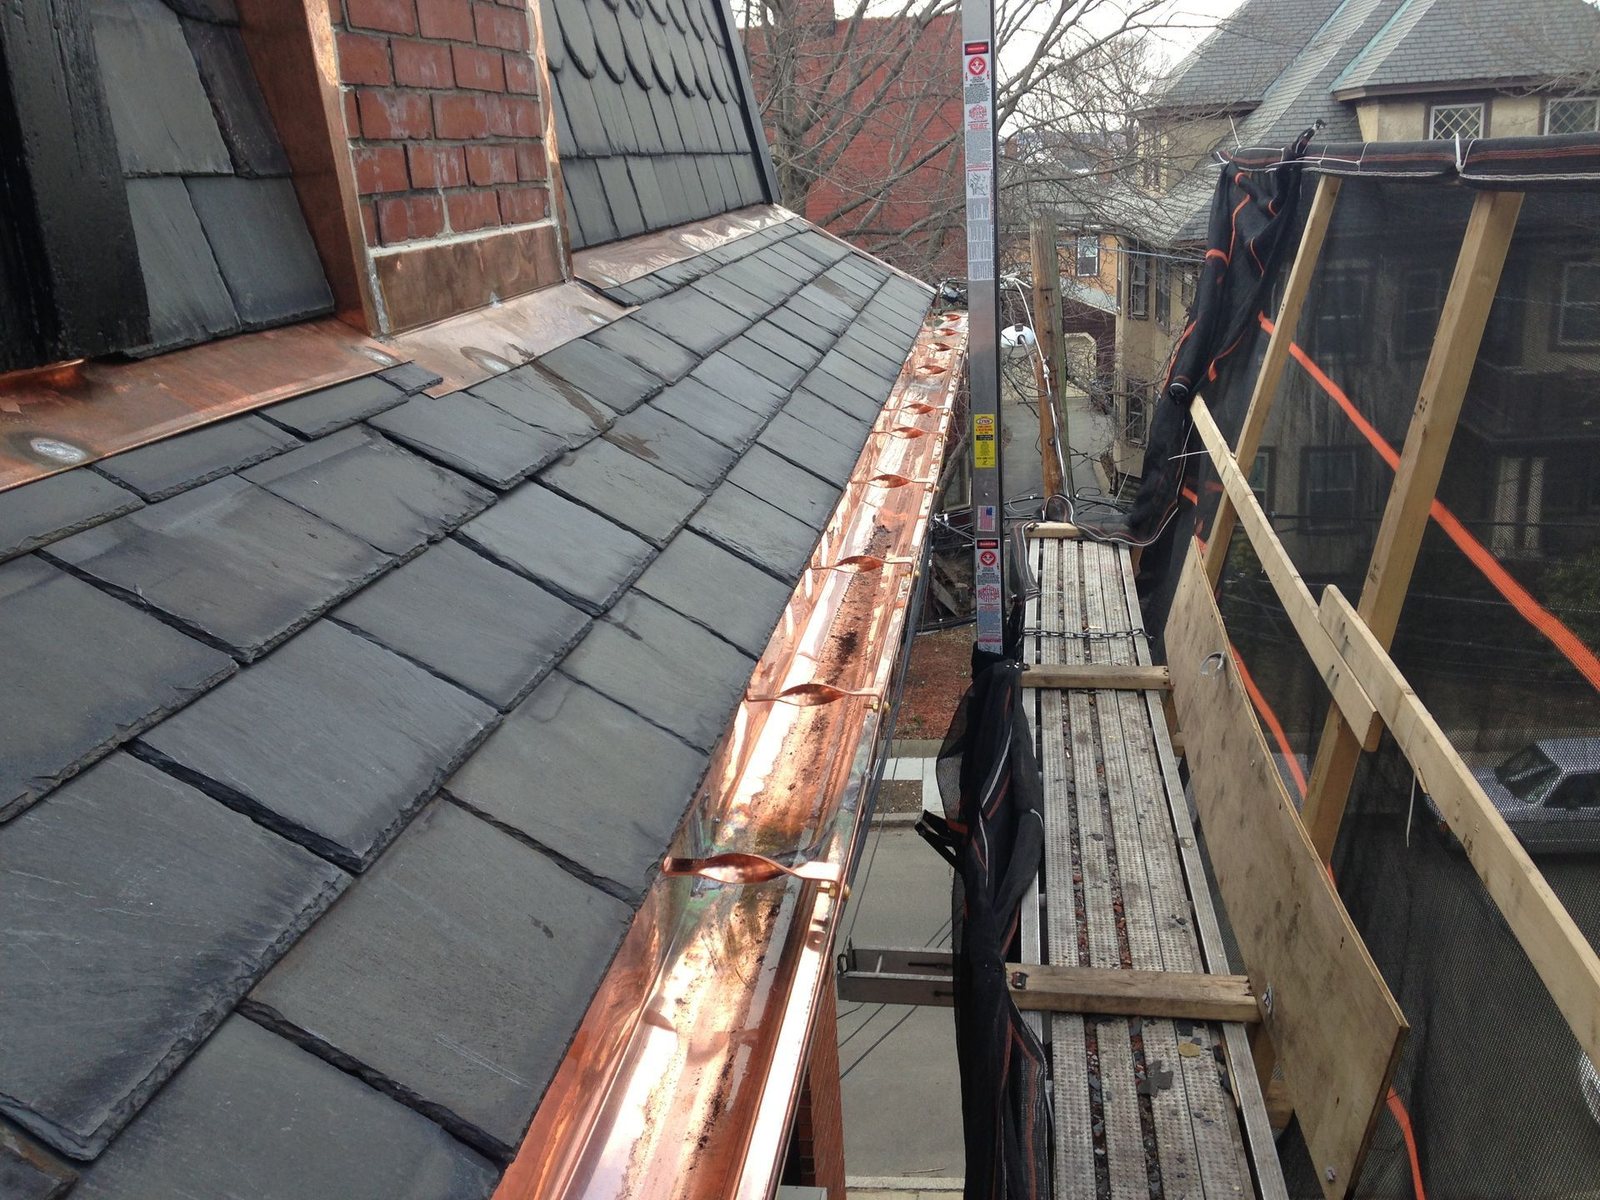
Step flashing is typically made from aluminum, steel, or copper, and of all the materials on the roof, the metal you pick here decides how long the joint lasts. Copper runs 50 years and up. It is what belongs on a slate roof or a copper roof, and on the historic restoration work we do most. Galvanized steel lands around 15 to 30 years and gives up first at the folds, the nail holes, and anywhere salt air reaches it. Aluminum runs 15 to 20 years and corrodes fast where it sits against alkaline masonry.
There is a rulebook on this in our state. The Massachusetts design guidelines specify lead-coated copper or aluminum for sidewall step flashing and discourage galvanized steel in certain locations. Material match matters too. Put aluminum flashing against a copper gutter and the two metals set up a galvanic reaction that eats the weaker one. That same long-run math is why we lay out the copper versus aluminum gutter numbers over 50 years before anyone spends a dollar.
On period homes we make the metal ourselves. Our own crew cuts, bends, and hand-solders copper step flashing and counter flashing on site, sized to the roof in front of us. No subcontractors touch it. That is the difference that keeps a 19th-century roof watertight, especially where the harder chimney flashing repair work starts.
How step flashing works to direct water off the wall
Water concentrates where a roof meets a wall or a chimney. It runs faster above gutters and pools behind decorative trim. Step flashing prevents water from seeping into roof joints, and its whole job is to prevent water from reaching a seam it could slip through and to divert water back onto the field.
Follow one raindrop. It hits the roof shingles and runs downhill toward the sidewall. The step flashing lifts it up and out over the next shingle course. Each overlapping piece hands it to the one below, and the whole run works as a single drain path. At the bottom, kick-out flashings direct water away from the wall intersection and throw it into the gutter instead of down the siding. Behind all of it, the wall’s water resistance barrier overlays the vertical leg of the step flashing, so anything running down the wall sheds onto metal, not behind it. That second layer is the backup.
Here is why metal beats a caulk gun. Step flashing can shift a little as the building expands and contracts with the seasons. That movement is the point. Boston’s freeze-thaw swings crack a rigid sealant within a few winters, and once it cracks it stops working. Loose, lapped metal keeps shedding. Proper installation of step flashing also reduces mold and mildew growth, because it keeps hidden water out of the wall cavity and the insulation where rot starts. On a Beacon Hill row house, for example, correctly woven step flashing keeps water from tracking behind the slate courses and clapboards, protecting the structure for decades.
How we install step flashing at a roof-to-wall joint
A quick note first. This is an overview, not a how-to. A homeowner should follow the manufacturer’s instructions, comply with local building codes, and hire a qualified roofer for the hands-on work. That said, here is the order the job runs in on a shingle roof:
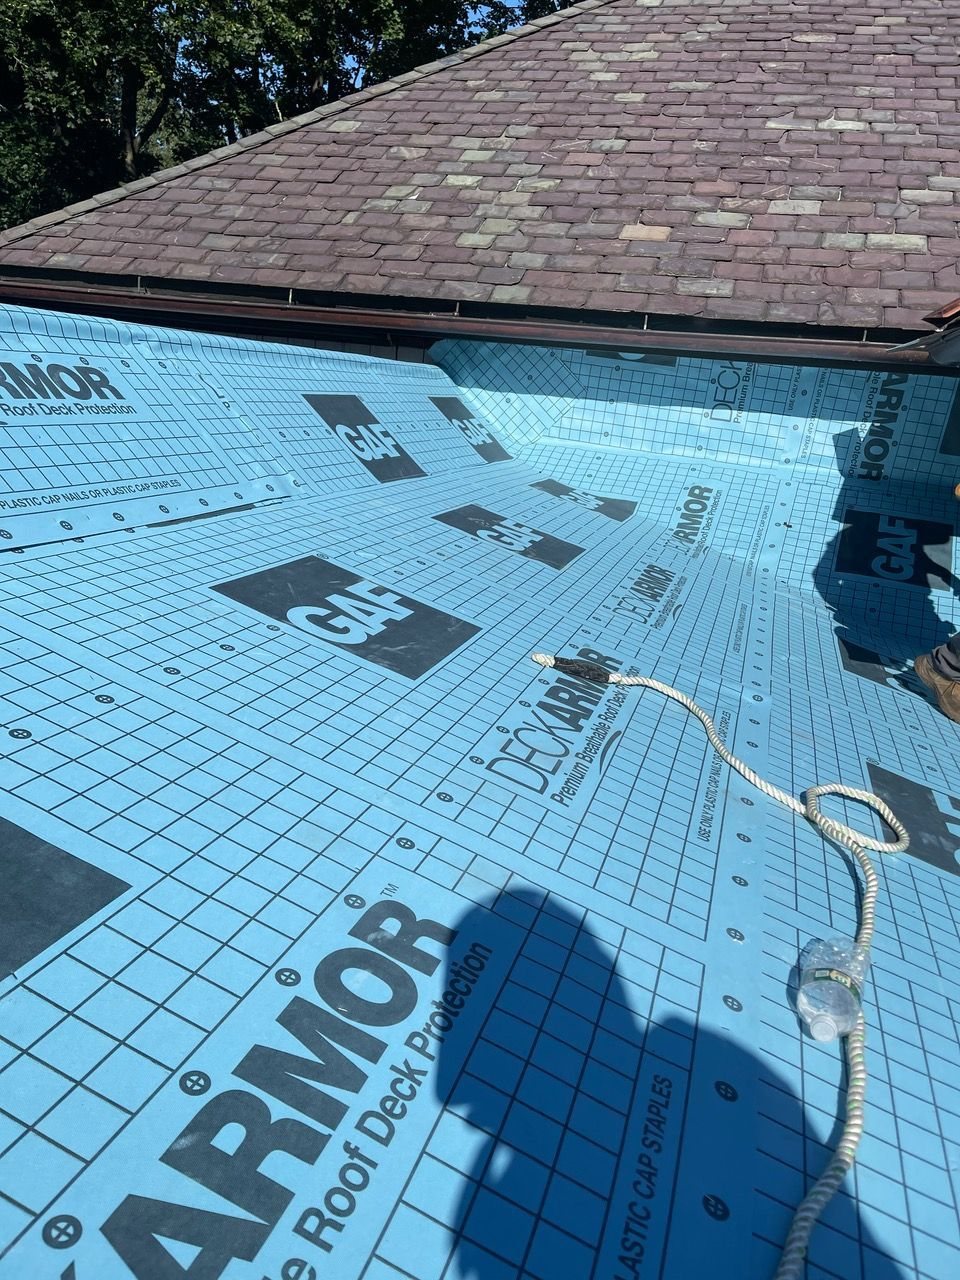
- Lay underlayment and ice-and-water membrane at the vulnerable areas
- Set the drip edge along the eaves
- Run the starter strip and the first shingle course
- Set the first piece of step flashing at the base of the wall
- Weave upward: shingle course, step flashing piece, shingle course
- Fit the kick-out flashing at the bottom termination
The install of step flashing should start from the eave and work upward, never the other way. Each piece of flashing must be integrated with the underlayment so the water always lands on top of the drainage layer, not under it. The first step matters most. The first piece has to sit correctly over the starter and first shingle course, because a gap there leaves a leak path at the base of the wall that nothing above it can fix.
Two rules keep the joint alive for decades. Flashing is secured only to the roof deck, so it can move with the building. Do not nail through the sidewall. One nail goes through the upper corner of the horizontal leg into the deck, and the next shingle course covers it, so no exposed nail holes are left to invite water in. On height, the code minimum from the International Residential Code is at least 4 inches up the vertical wall and across the deck. You still find 2 inches on older Boston roofs. We run 4 to 5 inches where snow piles against the wall.
The first step: setting the bottom pieces
Start at the bottom and align the first piece of step flashing with the edge of the sidewall, its horizontal leg flat on the roof deck over the underlayment, its vertical leg up the wall. On most homes here a 5-inch vertical leg gives enough cover against splash-back and snowmelt.
Lay the first full shingle course so it extends past the wall line, then set the first piece of step flashing on top. One nail through the upper corner of the horizontal leg fastens it to the roof deck. The next shingle course covers that nail and the top of the flashing. Then the second piece slides into place over the second shingle, lapping the previous piece by at least 2 inches. That is the rhythm.
The water resistance barrier overlays the vertical leg so any moisture on the wall sheds onto the metal, not behind it. On historic slate the same logic holds, but the fastening changes and the copper is cut, bent, and sometimes soldered right there on the roof with a hammer and hand tools. It is slower and it is why the joint outlives everyone who argued about the price, the same care we bring to standing seam copper roof work in Boston.
Weaving up the roof shingles: corners and terminations
The weave just repeats up the height of the joint. Shingle course, step flashing piece, shingle course, step flashing piece. Each new piece laps the previous piece by 2 inches or more, so the whole run stays one continuous drain from top to bottom.
Corners are where a rushed crew fails. At an outside corner the metal has to be folded to wrap the edge. At an inside corner it often needs a field-formed return pan so water cannot shortcut behind the pieces. On copper, we solder these transitions, and a soldered seam becomes a permanent watertight joint that outlasts any tape or sealant on the shelf.
At the top, where the sidewall ends or dies into a roof peak, the final piece gets cut along its bend line, folded flush to the wall, and secured. A little sealant is fine there, at that one spot, but it never replaces proper metal laps and a real shingle weave. The next section of roof past the wall gets its own flashing so the protection carries through without a break.
Common step flashing mistakes on older Boston roofs
From Somerville to Arlington, we see the same failures over and over. Inadequate installation of step flashing has led to leaks and roof damage on more homes than I can count, and the fix always costs more than doing it right the first time would have. Our Arlington slate and copper roofing crew pulls back siding and finds the same handful of errors:
- No step flashing at all, just caulk or roofing cement smeared across the joint
- One long strip of roll flashing where individual step pieces belong
- Nails driven through the vertical leg into the siding, which pins the metal so it cracks when the wall moves
- Overlaps of an inch or less, which let wind-driven rain slide up behind the metal
- Corroded stock reused from a previous roofing job instead of new flashing
Historic homes add their own trouble. A siding or masonry change from decades back often covered or cut away the original copper, leaving a joint that was fine until someone touched it. And mismatched metals, like aluminum step flashing run into copper gutters, quietly corrode from galvanic reaction. We hit both regularly on Brookline slate and copper roofs, where the historic details demand careful flashing to begin with.
The warning signs read from inside the house. A stain on a ceiling next to a dormer. Peeling paint or mold on a wall below a roof intersection. An ice dam that pushes meltwater behind the metal every winter. Up on the roof it looks like rust, gaps, missing pieces, or nail holes where the metal has backed off the wall and no longer sits flush. Any of those means the weather seal at your roof-to-wall joint is done, and the water damage behind it has usually started. Left alone, it can even void a shingle manufacturer’s warranty and shorten the life of slate or copper that should have lasted decades.
Counter flashing, base flashing, and drip edge
Step flashing is one piece of a larger system, and the parts around it matter as much. Counter flashing sits above it. Counter-flashing is used to cover the upper edges of step flashing, set into the mortar joint on a masonry wall or chimney and folded down over the raw turned-up edge, so water can never get behind it. On brick that is a cut-in joint, not a bead of anything.
Below and across the joint you have the rest of the family. Base flashing sits down at the roof surface where a chimney meets the deck. Apron, or headwall, flashing runs as one piece across the width of a wall where a slope dies into it from below, doing the job step flashing does along a sidewall. A plumbing vent boot seals around a pipe through the roof plane. A skylight flashing kit wraps the frame and sends water back onto the roof. And the drip edge along the eaves and rakes guides runoff into the gutter and stops it wicking back under the shingles.
On slate and copper roofs we fabricate the copper base flashing and counter flashing in-house so every part matches and the period details survive. Each one guards a different weak spot. Together they build a full envelope around the joints most likely to leak.
When to repair, when to replace, and how we handle it
Step flashing provides long-term protection against water intrusion, but no metal lasts forever. A few moments tell you it is time to act. A leak has shown up near a wall, a dormer, or a chimney. You are re-roofing anyway, and local building codes plus the manufacturer guidelines call for new step flashing whenever the roof shingles are replaced. Or you are restoring a historic roof and the original material is spent.
Before anything else we inspect the joint. We look for rust, gaps, missing pieces, thin overlaps, and heavy caulk patches. Exposed holes where nails have backed out, or metal that no longer sits flush to the wall, tell us the health of the roof envelope is already compromised and water has a way in.
Our process is plain. We pull back siding where we have to, fabricate copper or galvanized steel flashing to the exact length your roof needs, and integrate every piece with the slate, copper, or shingle roof so each one is secure and properly lapped. Related work often rides along with a flashing repair: chimney flashing and counter flashing, gutter adjustments, ice-melt systems to cut ice damming, and routine maintenance. If a leak cannot wait, our roofers handle emergency response too. You can see the full range on our services page.
Frequently asked questions
What is step flashing made from, and how long does it last?
Step flashing is typically made from aluminum, steel, or copper. Copper runs 50 years or more and is what we put on slate and copper roofs. Galvanized steel lands around 15 to 30 years and rusts first at the folds and nail holes. Aluminum runs 15 to 20 years and corrodes where it touches masonry. On a roof built to last a century, copper is the metal that matches it.
How far up the wall should step flashing go?
The code minimum is at least 4 inches up the vertical wall and across the roof deck, and the International Residential Code sets that floor. You will still see 2 inches on older Boston work, which was the old habit. We run 4 to 5 inches on snow-prone roofs, because that extra inch or two is what holds up when meltwater backs up against the wall in February.
Can step flashing be repaired on a shingle roof, or does the whole roof come off?
It depends where the failure is. One bad run at a dormer or a chimney is a targeted repair: pull the siding back, strip the old metal, weave in new. During a full re-roof it is different. Local building codes and most manufacturer guidelines call for new step flashing whenever the roof shingles are replaced, so we never reuse the old stock.
Why not just caulk the roof-to-wall joint?
Because caulk is a sealant, not flashing. A wall and a roof move at different rates through Boston’s freeze-thaw winters, and a rigid bead cracks within a few seasons. Step flashing is loose metal that shifts with the building and keeps shedding water the whole time. Caulk buys you a couple of dry years and then hands you a hidden leak.
What are the warning signs step flashing has failed?
Look for a stain on a ceiling next to a dormer, peeling paint or mold on a wall below a roof intersection, or an ice dam that keeps coming back in the same spot. Up on the roof it shows as rust, gaps, missing pieces, heavy caulk patches, or nail holes where the metal has backed away and no longer sits flush to the wall.
Do you make the copper step flashing in-house?
Yes. On historic slate and copper work our own crew cuts, bends, and hand-solders the copper on site, no subcontractors. That matters at corners and terminations, where a soldered copper seam becomes a permanent watertight joint that no tape or sealant can match on a period home.
Talk to the owner
We start with a real assessment on the roof, not a number typed in from a photo. A roof-to-wall joint hides its trouble under siding and behind slate, and you cannot call the repair-or-replace question from the ground. So we get up there and look.
Every job gets walked by Arturo before a number goes on paper. If you have a stain near a wall or a chimney and cannot tell whether you need one run of new flashing or something larger, that walk is free. See our slate and copper roofing service, or schedule a free assessment and we can tell you straight where the water is getting in.